In 2023, I set out to create one build to rule them all (at least, bigger than any project I’d done before): a microscale map of Middle-Earth depicting every major location from the film trilogy. After the miniature locations were complete — read more on that here — the next task was upon me: building a 3-D map out of bricks.

The finished map — read on to learn how it was made!
SETTING THE SCALE
When it came to getting the map’s scale right, I had to go to the only reference source I could think of: an old poster of Middle-Earth that used to be hanging in my room. When I had finished all 19 of the miniature locations, I was praying they would all fit within the size of that poster — then I could just build the map in the same scale as the poster!

So I laid out the poster on the floor, and started to pile the mini builds onto it, roughly correlated with their location on the map (making some sacrifices for space) — and it pretty much worked! My LEGO map would need to be slightly bigger than the poster, but it was a close enough fit that I could work with it. I started to mock up the Misty Mountains shape, the coastline, and even the lettering reading Middle-Earth.
BUILDING THE MAP
From the outset, I knew I wanted the brick-built map to be sideways-facing bricks, giving it a smooth surface and using slightly less bricks than if the whole thing was tiled. However, building this way means a LOT of thought needs to go into planning, because making any changes requires taking apart huge chunks of the entire build.
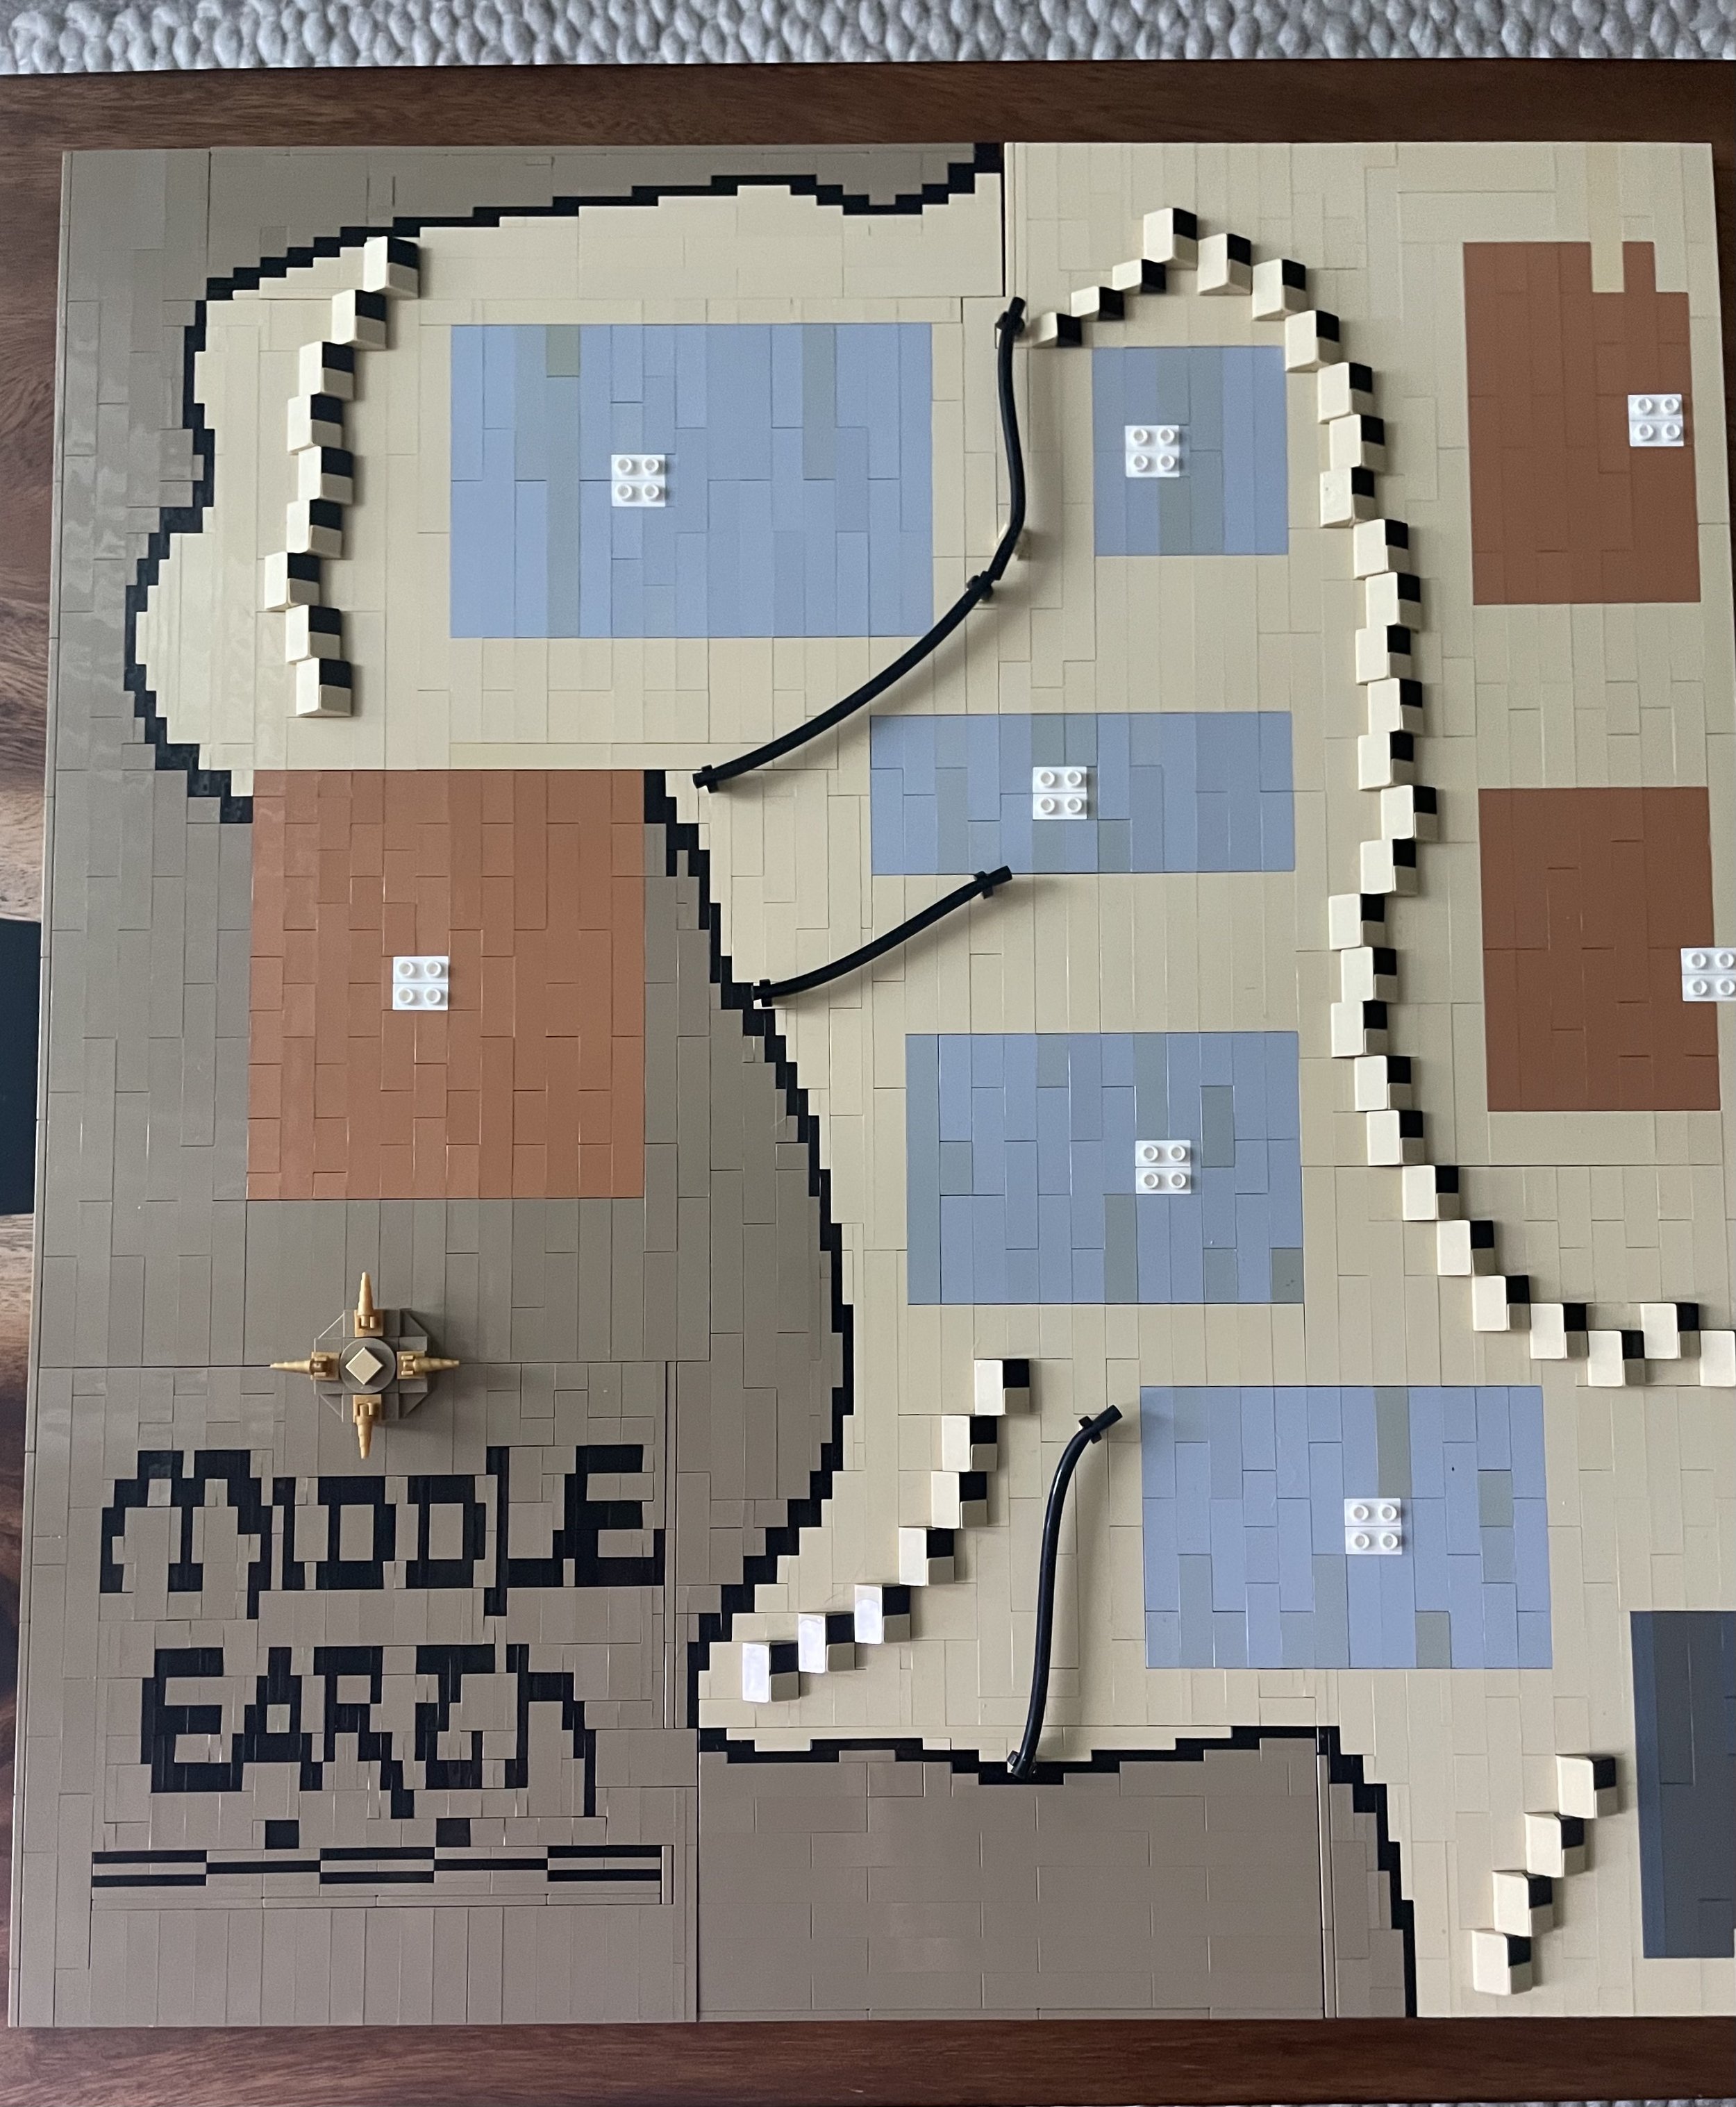
I quickly realized that the coastline would need to be built as sideways-facing plates, staggered to create the illusion of a curve. This would allow me to place dark tan on one side of the coast (representing water) and tan on the other side (representing land). This line was one of the first parts of the map that I built, as I knew I’d have to build out from that shape on either side. There are a couple tricky sections where I had to switch the direction of the bricks from sideways to up and down at the top and bottom of the coast.
The next challenge was the geographical features: rivers and mountains, some of which are quite famous in Tolkien lore. I initially thought I could capture all of these with the same plate line technique as the coast, but I quickly realized that I would have almost no ability to edit my work with that technique, as every line would be instantly baked into the rest of the build. So I decided to have the mountains jutting out from the map using cheese slopes and a SNOT technique, so I could shift them around at will. It would also give the map more of a topographical look. The rivers, meanwhile, would be black flex tube, and would only need to be locked in at anchor points on either end.
I started with the curved S-shape of the Misty Mountains, the largest and most iconic mountain range in Middle-Earth. That became almost a mid-line in the map, and I was able to space out the mini locations to the left and right of it. I didn’t have nearly enough flex tube for all the rivers, so I initially just left clip anchor points and hoped I measured the right length for the Bricklink order!
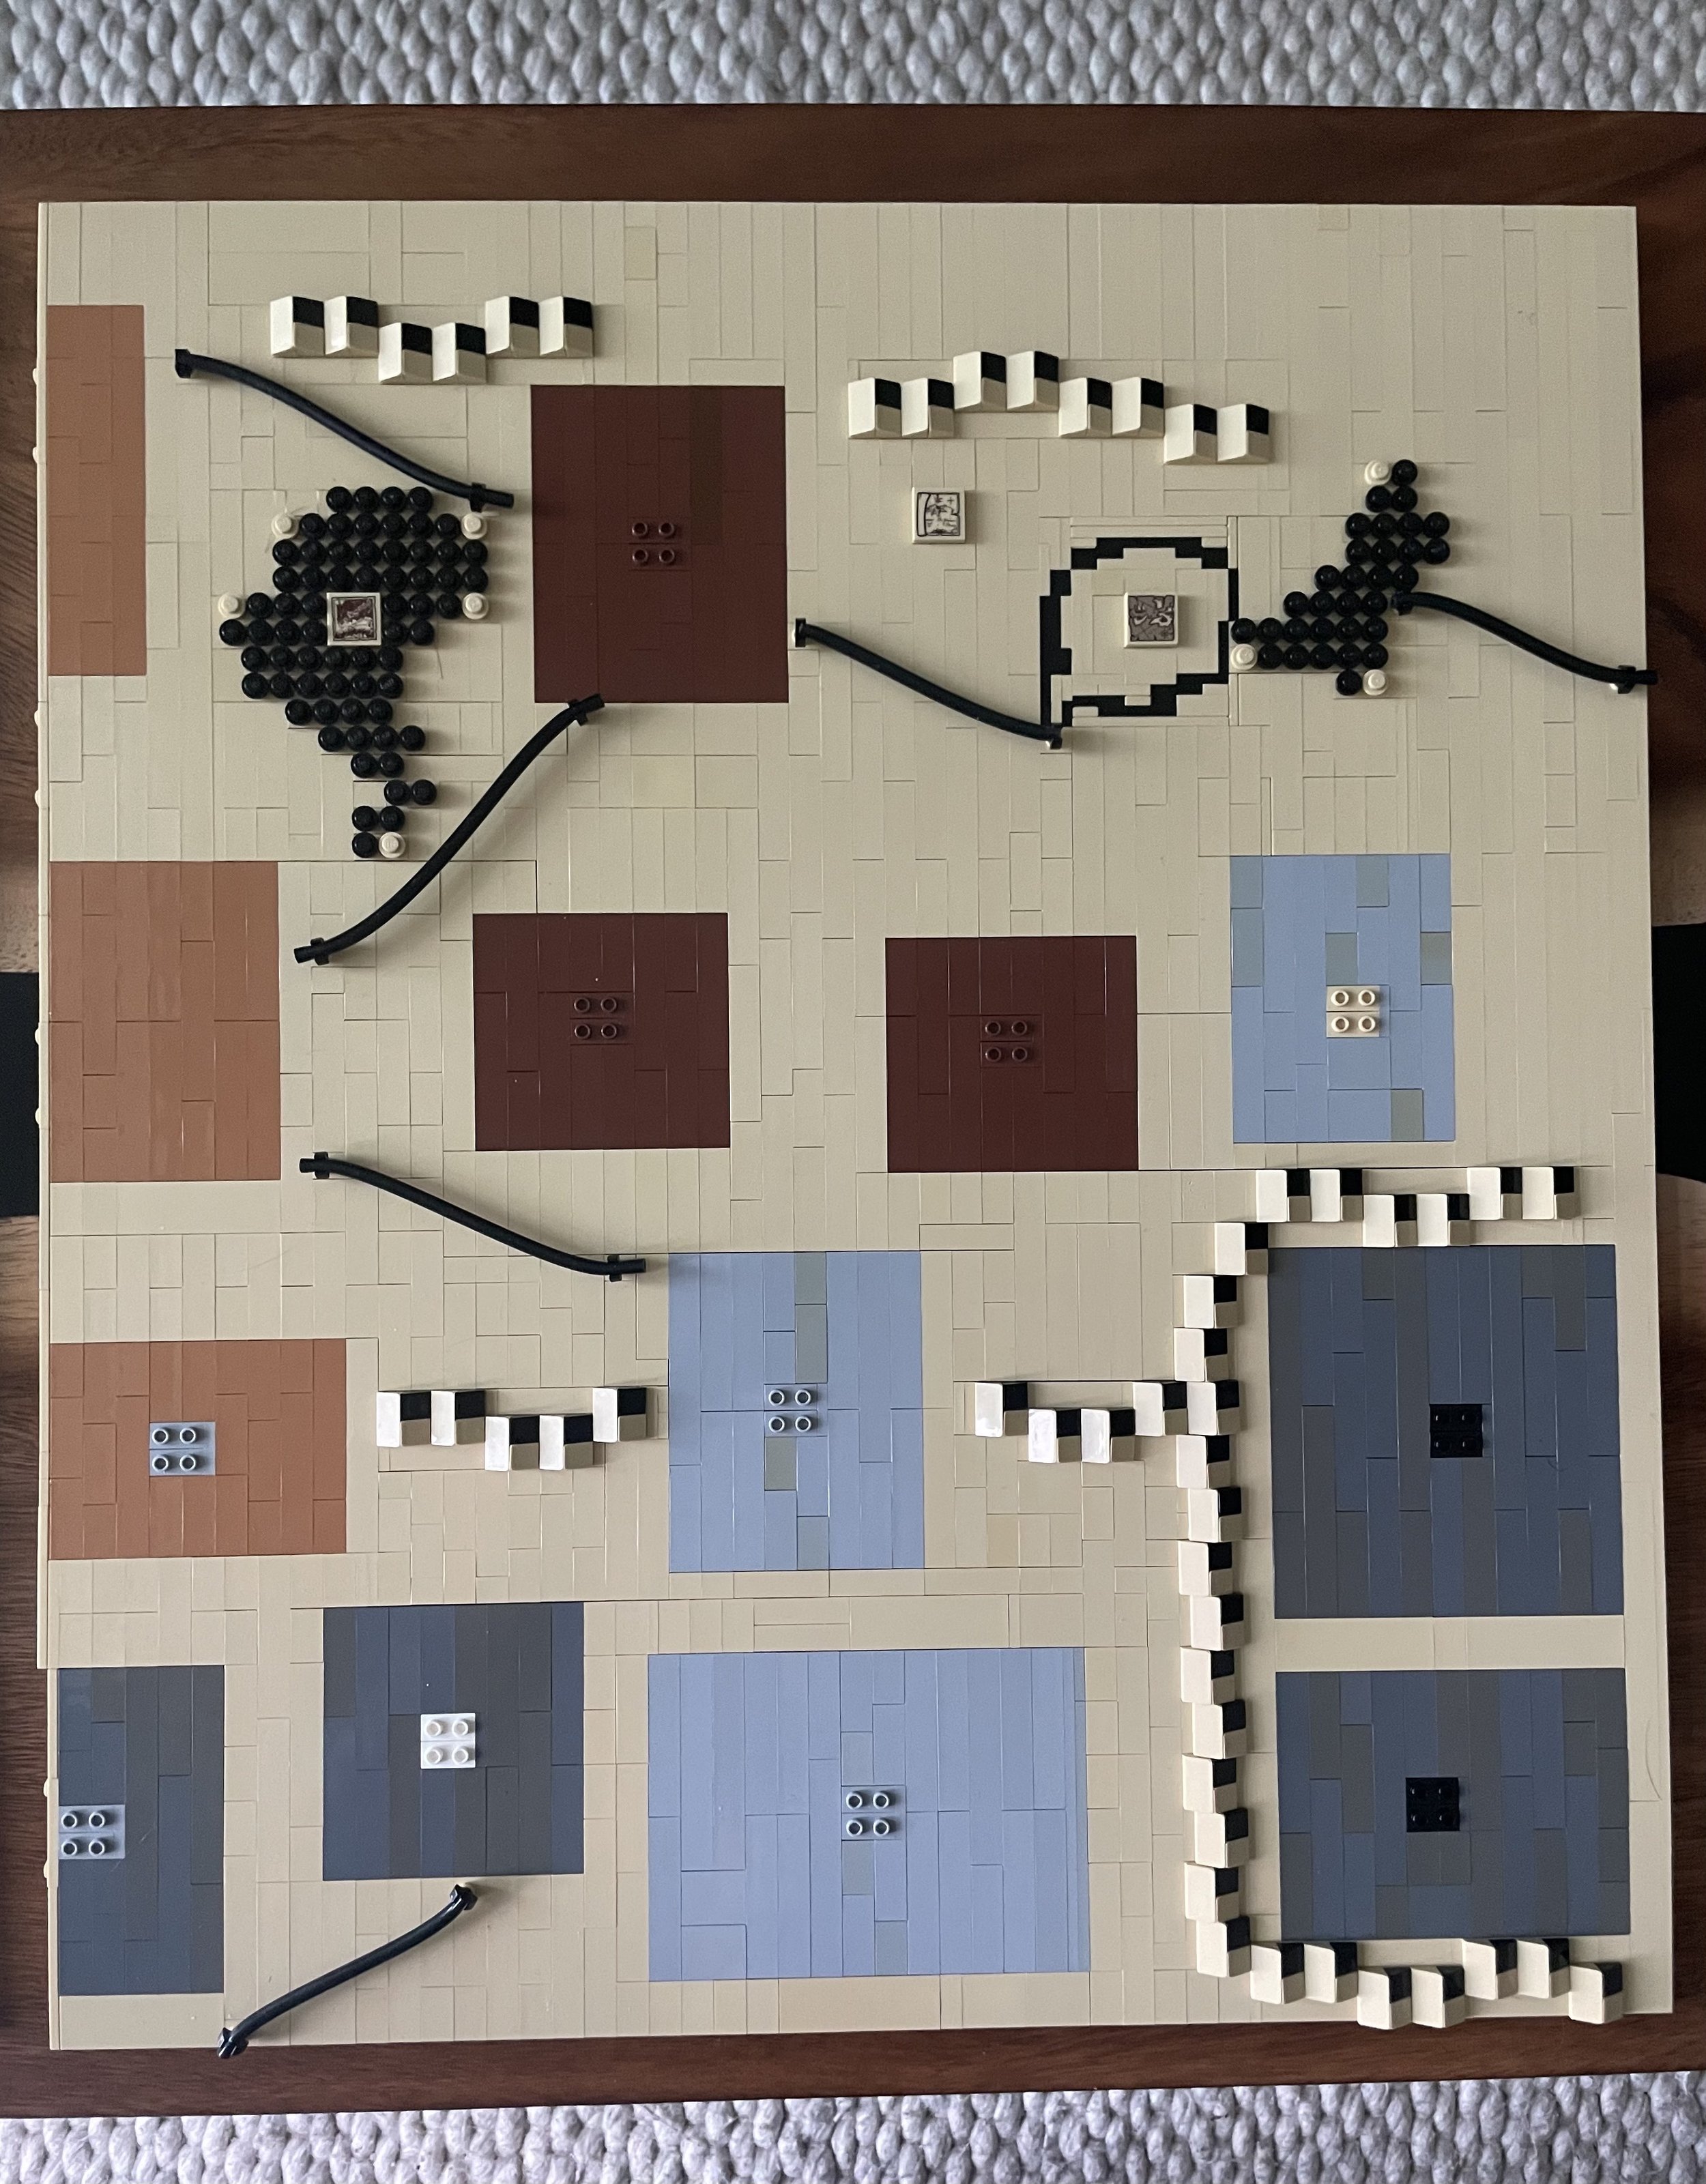
Then came the sections where the mini locations were supposed to go. I always figured the locations would be attached by a single SNOT (studs-not-on-top) brick, and started out by just layering those into the map in the same tan colors I was using for everything. But I quickly realized two things: 1) I would just be guessing where to put the locations every time if it’s all the same color, and 2) I was going to run out of tan bricks, FAST. Luckily, there was an easy solution: build a rectangular section for each mini location that’s exactly the same size as its base, and do each one in a different color from the rest of the map with the bricks I had available. So, I ended up with a medley of mostly earth-toned rectangles that signaled where to put each mini location. I tried at first to color-code the rectangles according to an arbitrary system (good vs evil places?) but ended up just making it work with whatever parts I had — there are thousands of bricks in this base, and I didn’t want to spend a fortune on sections not meant to be seen other than on this blog!
ARRANGING THE LOCATIONS

As a hardcore Tolkien fan, I wanted to do the best I could to honor the layout of the original map; after all, Middle-Earth is a major character of the Lord of the Rings story, and one does not simply walk into Mordor.

That being said, I also told myself that this map exists as an entirely different artistic medium with its own set of constraints (size and cost being major ones!) so I knew I had to make some sacrifices. For example, Moria had to go east of the Argonath, when really it should be northwest. Lothlorien and Helm’s Deep are too far north, Bree is too far south, etc — so for the strict Tolkien map enthusiasts out there, I definitely know my map shouldn’t be taken for accuracy! But for me, it was important to just have every location represented on the map in roughly the right areas where you could follow the journey of the Ringbearer and the Fellowship, and also have a balanced aesthetic layout where all the locations were somewhat evenly spaced across the brick-built platform.

Something that I think worked out well in the arranging of the locations was that it had a nicely even layout of green across the landscape: The Shire, Fangorn Forest, and Lothlorien each bring green to their respective corners. It also very clearly shows that Frodo’s walk was anything but simple: the Shire is on the upper left-hand side of the map, and Mordor is on the lower right-hand side! The locations also clearly get more sinister in design and color palette as you move closer to Mordor, in keeping with the story. I also included some shout-outs to The Hobbit as well, even though this map is in tribute to the Lord of the Rings: I have a tiny Lonely Mountain parchment tile in its fitting place on the map, as well as a Mirkwood Forest tile (both from a Hobbit set!) I thought these call-outs would be fun for those who noticed, and sure enough someone did call out “The Lonely Parchment,” ha!
BUILDING ON A DEADLINE
I was already well into this project when I learned that there was a LEGO IDEAS Lord of the Rings contest; I knew I had to submit to it, being the massive LOTR x LEGO fan I am. But I learned about the contest a week before the deadline, and I hadn’t built ANY of the map yet! So I worked every hour I could spare on finishing the mini-builds between my day job, and then in the last weekend before the deadline, I stayed up into the late hours of the night to crank out the actual map section. I was throwing every brick I could at this thing just to get it done, and ended up submitting it at 2:30am, when the deadline was 3am! I was really proud to have finished a version of the map, and loved seeing the positive response online. It didn’t win the competition, but I was so happy to have contributed to an official LEGO contest recognizing LOTR — I’d been waiting for them to re-start the theme for 10 long years, and I hope this is a sign of more to come!
THE PROPS

Partway through building the mini locations I realized that I wanted to create life-sized props scattered around the map, like it’s in Bilbo’s Study. It felt like a great way to pair microscale building with 1x1 scale building, with the map itself as a bridge between the two! The first prop I tackled was the Red Book of Westmarch, the fictional version of “The Hobbit” and “The Lord of the Rings” books written by Bilbo and Frodo respectively. I styled it after the official LEGO pop-up book (more on that function in a second) and my favorite part is the brick-built “B” lettering on the cover in the same style that the Master Builders use at LEGOLAND.

I also had to include the iconic sword Sting, which has a very unique curvature to the blade that was an interesting challenge in brick form. I built the hilt using silver tooth pieces to create the look of Elven threads of silver wrapping around. I definitely built this sword for looks and not function; sadly it would not hold up very well to being swung at Orcs!

A late addition was Bilbo’s pipe, which is almost always sure to be smoked with the finest Longbottom Leaf in the South Farthing. I created the curved handle using flex tube and 1x1 round bricks stacked on top of each other; it actually is quite strong, and unlike Sting, it can hold up to being held on the doorstep of Bag End! It also has some translucent bricks creating the effect of residual puffs of smoke. Next to the pipe I placed an inkwell and feather-tipped pen — the pen in particular was a fun challenge using mostly wedge plates carefully constructed so they never needed more than two plate layers for stability.
Finally, of COURSE I had to build a replica of the One Ring, complete with its chain. I purposefully built it with some white brackets to look like the gold is shimmering in the light.
A HOBBIT’S POP-UP BOOK

After I decided to build the Red Book of Westmarch based on the Pop-up Book set, I initially thought the mini locations I had already built could be placed inside the book for an alternate presentation. However this was tricky to do while displaying the map at conventions at events, and many people wanted to see what was inside the book — to which I had to say “nothing”! So I decided to build a page design on the interior, based on Tolkien’s famous “Doors of Durin” drawing in the Fellowship of the Ring novel: the entrance to Moria. I also included a page of brick “text.” The Doors of Durin was one of the most complicated designs I’ve ever attempted, with plates and tiles switching angles constantly throughout to create the thin and curved lines. It was inspired by LEGO sign work I had seen at LEGOLAND California.
BRICKWORLD

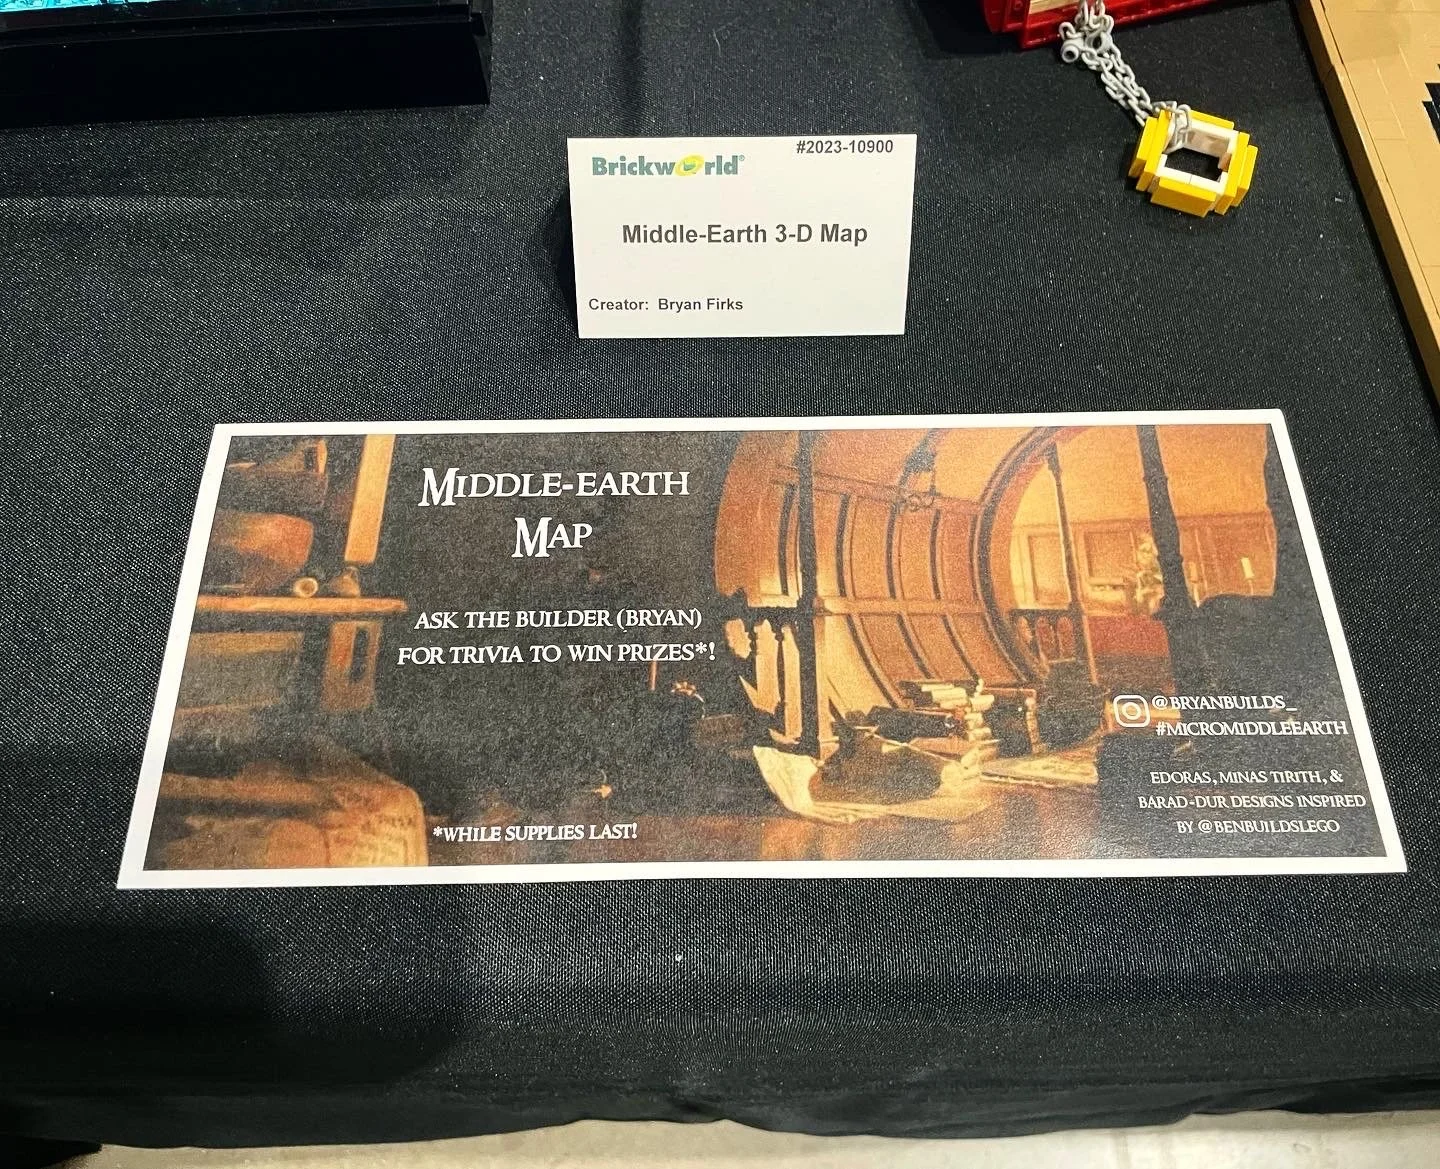
I had the great opportunity to reveal this build to the world at Brickworld 2023, where it was met with such a wonderful reception. I put out a sign that encouraged attendees to ask the builder for trivia, and I was surprised how many brave souls were willing to take on the challenge!

I mostly asked people to name every mini location on the map, which is not necessarily an easy task on the spot even for a Tolkien aficionado. If people got that right, they automatically won a small brick-built LOTR prize I made multiples of before the convention. There were a few brave trivia masters who wanted to take on the hard questions, which I very excitedly doled out, and if they got those right, I had two grand prizes for the taking: a LEGO life-sized One Ring, and a miniature Oliphaunt just like on the Minas Tirith micro-build.

After an amazing weekend, the build was awarded with the “Best Micro-Scale” award at the convention, which was completely unexpected and exciting. Seeing as this is the largest LEGO convention in the world, I certainly never went into it with any expectation of winning an award. It was so wonderful to bring a project that was personal to me and reflected the passion I had for my favorite fictional world, and I was so happy to share it with other fans who got to enjoy it as well. I met someone who had charted the entire genealogy of every family in Tolkien’s universe, and someone who was a linguistic consultant for the Tolkien Estate. How awesome to find other people with the same cross-section of (super nerdy) fandoms! One family I met — grand-prize trivia winners! — watched the film trilogy every year just like me.
LIGHTING MIDDLE-EARTH

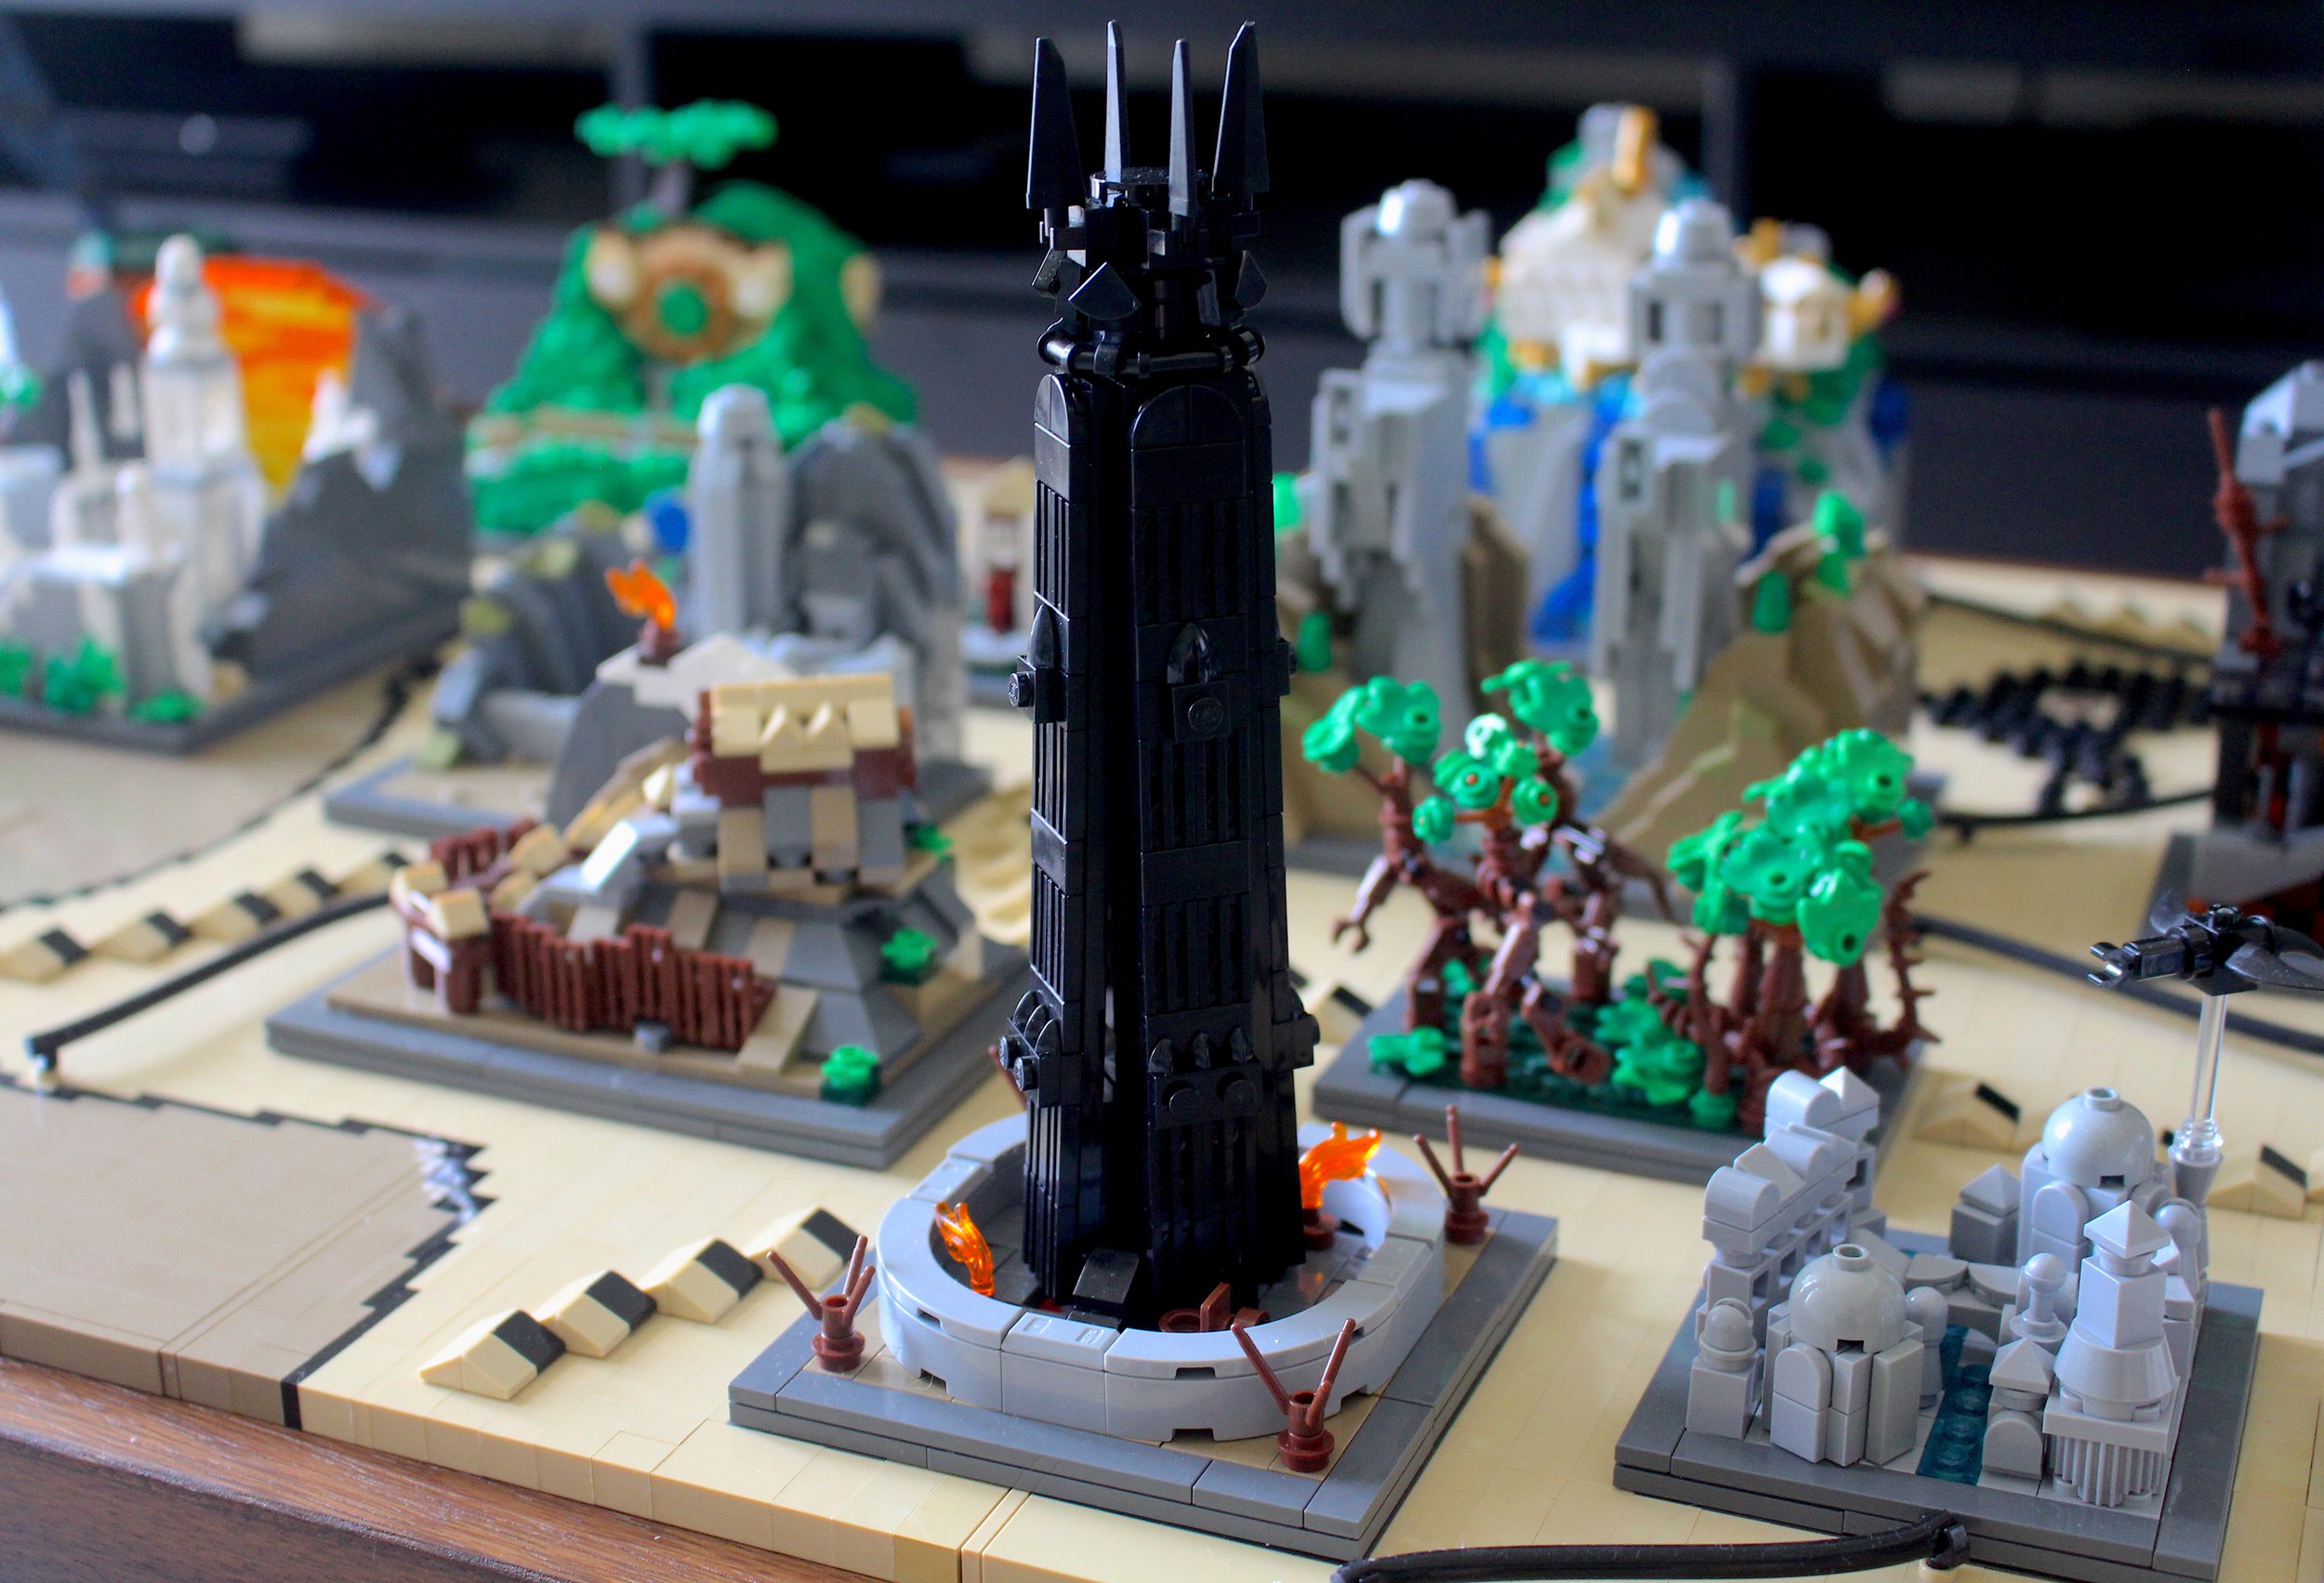
A new challenge I took upon myself for this build — mostly to showcase at Brickworld — was to fully light it using third-party LEGO-compatible lights. I strung them through the build, trying to tactfully pick the locations. Lighting the beacons of Minas Tirith and Edoras was a no-brainer, as well as giving Minas Morgul an eerie neon glow. Mount Doom was already built with a light brick, and the Eye of Sauron needed to be casting light on all of Middle-Earth. Lothlorien was a late decision to light up, but possibly the best: as one of the tallest and most uniquely-shaped builds, it definitely deserved the light that would naturally be given to it by the Lady of the Wood.

I initially had planned a green glow coming from the Dead Marshes, but instead hoped the glow in the dark bricks under the water would do their job, and instead gave the green light to Fangorn Forest, to make another of my favorite locations pop. Finally, I included a blue light for the Doors of Durin (this required caving out the build and making two different sections behind the door, a light-up one and regular one.) I added a small orange light underneath in the Mines as well, to hopefully draw the eye to the Balrog and the bridge of Khazad-Dum which were a bit easy to lose in the daytime.
I really loved seeing the whole map light up when the lights went dark during “World of Lights” at Brickworld; it created a new dimension to the map and I found myself wanting to get down on eye-level with it and track the way the light bounced off all the locations. It was certainly tough to light the build with all the tiny cords (and trying to hide them in the build!) but definitely worth it in the end.
This was an extremely special and personal project that I loved creating this year. It makes a difference to build something you’re truly passionate about, and so far has been endlessly rewarding to share that with the world. Thanks for reading, and I hope you enjoyed the journey through Middle-Earth.